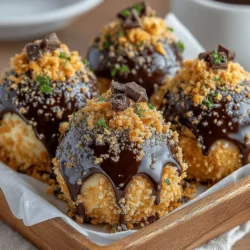
Introduction to No-Bake Cookie Butter Cheesecake Bombs
Indulging in a sweet treat doesn’t always have to be a time-consuming affair, and that’s where these No-Bake Cookie Butter Cheesecake Bombs come into play. Combining the rich, creamy flavor of cheesecake with the irresistible taste of cookie butter, these delightful bites are perfect for any occasion. Easy to prepare and requiring no baking, they are sure to impress friends and family alike. This article will guide you through the recipe while providing tips and insights on how to make these scrumptious cheesecake bombs a hit at your next gathering.
Understanding the Allure of No-Bake Desserts
The Convenience of No-Bake Recipes
In today’s fast-paced world, finding time to whip up elaborate desserts can be a challenge. This is where no-bake recipes shine, offering a convenient solution for anyone looking to satisfy their sweet tooth without spending hours in the kitchen. No-bake desserts are not only quick to prepare, but they also eliminate the need for an oven, which can be particularly advantageous during warmer months or when hosting gatherings in smaller spaces. The simplicity of these recipes allows even novice bakers to create impressive and delicious treats with minimal effort.
No-bake cookie butter cheesecake bombs, specifically, require no complex skills or techniques. The ingredients blend together in a matter of minutes, making it a perfect project for both busy parents and enthusiastic home cooks alike. This convenience factor is a significant part of their appeal, allowing anyone to indulge in a delectable dessert without the stress of traditional baking methods.
Ideal Occasions for No-Bake Cheesecake Bombs
The versatility of no-bake cheesecake bombs makes them suitable for a variety of occasions. Whether you’re hosting a casual gathering with friends or planning a more formal celebration, these treats can easily adapt to the theme of your event. They are perfect for summer barbecues, holiday parties, birthdays, and even as a sweet surprise for a cozy movie night at home.
Their bite-sized nature makes them an excellent choice for potlucks and dessert tables, where guests can sample a variety of flavors without overwhelming themselves. Additionally, since they can be prepared in advance and stored in the refrigerator, you can enjoy the peace of mind that comes with having a delicious dessert ready to serve at a moment’s notice.
Ingredients Breakdown
Essential Ingredients for Cheesecake Bombs
To create the perfect no-bake cookie butter cheesecake bombs, it’s important to have the right ingredients on hand. Each component plays a crucial role in achieving the delightful balance of flavors and textures that make these treats so irresistible.
– Cream Cheese: The base for achieving that creamy consistency. Softened cream cheese provides the luscious texture that is characteristic of cheesecake, allowing it to meld seamlessly with the other ingredients.
– Cookie Butter: The star ingredient that adds depth and sweetness. Cookie butter, made from crushed cookies blended with spices and oils, infuses the cheesecake mixture with a warm, spiced flavor that enhances the overall experience.
– Powdered Sugar: For that subtle sweetness without graininess. Unlike granulated sugar, powdered sugar dissolves quickly, ensuring a smooth and creamy mixture that won’t have any unpleasant gritty texture.
– Whipped Cream: Adds lightness and fluffiness to the mixture. Incorporating whipped cream not only makes the cheesecake bombs more airy but also balances the richness of the cream cheese and cookie butter.
– Graham Crackers: Provides a crunchy texture and classic cheesecake flavor. Crushed graham crackers serve as both a flavor enhancer and a textural contrast, reminiscent of traditional cheesecake crusts.
– Chocolate Chips and Coconut Oil: The coating that adds a rich finish. The combination of melted chocolate chips and coconut oil creates a glossy, decadent shell that envelops the cheesecake filling, making each bite a true indulgence.
Optional Ingredients for Customization
One of the great things about no-bake cheesecake bombs is their versatility. While the basic recipe is delicious on its own, there are plenty of opportunities to customize and make these treats your own. Consider experimenting with different types of chocolate for the coating—dark chocolate, milk chocolate, or even white chocolate can create diverse flavor profiles.
Additionally, you can incorporate other flavors into the cheesecake filling. For example, adding a spoonful of peanut butter can create a delightful twist, while fresh fruit puree can add a refreshing note. The possibilities are endless, allowing you to tailor these cheesecake bombs to suit your taste preferences or the theme of your gathering.
Step-by-Step Guide to Making No-Bake Cookie Butter Cheesecake Bombs
Preparing the Cheesecake Mixture
Now that you have a solid understanding of the ingredients involved, it’s time to dive into the actual preparation of the no-bake cookie butter cheesecake bombs. Follow these detailed steps to create a smooth and creamy cheesecake base that will form the heart of your delicious bites.
1. Soften the Cream Cheese: Start by ensuring your cream cheese is softened to room temperature. This step is crucial for achieving a smooth mixture. If you forget to take it out of the fridge beforehand, you can cut it into smaller pieces and microwave it for a few seconds, just until softened—be careful not to melt it.
2. Mix the Base: In a large mixing bowl, combine the softened cream cheese and cookie butter. Using an electric mixer, beat the two ingredients together on medium speed until well combined and creamy. This should take about 2-3 minutes. Scrape down the sides of the bowl occasionally to ensure everything is evenly mixed.
3. Add the Sugar: Gradually add the powdered sugar to the mixture, continuing to beat until combined. The sugar should dissolve completely, leaving you with a sweet and creamy filling. Taste the mixture to ensure it has the desired level of sweetness; feel free to adjust by adding more sugar if needed.
4. Incorporate the Whipped Cream: Gently fold in the whipped cream using a spatula. This step is essential for adding lightness to the filling. Avoid overmixing, as you want to maintain the airy texture of the whipped cream.
5. Chill the Mixture: Once your cheesecake mixture is smooth and fluffy, cover the bowl with plastic wrap and place it in the refrigerator for about 30 minutes. This chilling time allows the flavors to meld and makes it easier to form the cheesecake bombs later on.
By following these initial steps, you are well on your way to creating an irresistible dessert that will delight anyone lucky enough to take a bite. The next part of the recipe will walk you through the process of shaping and coating your cheesecake bombs, ensuring they look as good as they taste. Stay tuned for more delicious details!
{{image_2}}
Folding in the Whipped Cream
One of the critical steps in creating a luscious No-Bake Cookie Butter Cheesecake Bomb is incorporating the whipped cream into the cheesecake mixture. It’s important to fold the whipped cream rather than stir it aggressively. Folding is a gentle technique that involves carefully lifting the mixture from the bottom and folding it over the top. This method is essential because it maintains the airy quality of the whipped cream, resulting in a light and fluffy cheesecake filling.
To fold properly, use a rubber spatula or a large spoon. Start by adding one-third of the whipped cream to the cookie butter and cream cheese mixture, gently combining them to lighten the density. Then, add the remaining whipped cream and continue folding until no streaks remain. Be patient during this process; the goal is to keep as much air in the whipped cream as possible, which will lend a delightful texture to your cheesecake bombs.
Chilling the Mixture
Once the whipped cream is folded in, it’s crucial to chill the mixture before forming the cheesecake bombs. Placing the mixture in the refrigerator for at least 30 minutes allows it to firm up, which makes it easier to scoop and shape. Chilling not only enhances the flavors—allowing them to meld together—but also ensures the bombs hold their shape when you start rolling them into balls.
During this chilling period, the fats in the cream cheese and cookie butter will solidify slightly, creating a firmer texture that is ideal for shaping. This step is essential; skipping it may result in a runny mixture that is difficult to handle.
Forming the Cheesecake Bombs
After the mixture has chilled, it’s time to form the cheesecake bombs. Begin by preparing a baking sheet lined with parchment paper to catch any drips and to provide a non-stick surface for the bombs. Using a cookie scoop or a tablespoon, portion out the chilled cheesecake mixture. Aim for uniform sizes—about 1 to 1.5 inches in diameter—to ensure even freezing and coating.
Roll each portion between your palms to create smooth, round balls. If the mixture feels sticky, you can lightly dampen your hands with cold water to help prevent sticking. Once rolled, place the cheesecake bombs on the prepared baking sheet, leaving space between each one to prevent them from sticking together during freezing.
The Freezing Process
Freezing the cheesecake bombs is a crucial step that guarantees they maintain their shape, especially when coated in chocolate. After rolling them, place the baking sheet in the freezer for at least 1 to 2 hours. This allows the bombs to firm up significantly, making them easier to handle when it comes time to coat them in chocolate.
Freezing also enhances the overall texture of the cheesecake bombs, ensuring they are creamy yet firm. If you’re preparing these in advance, they can be kept in the freezer for up to a month, making them a convenient treat for unexpected guests or special occasions.
Melting the Chocolate
While the cheesecake bombs are freezing, you can prepare the chocolate coating. Use high-quality chocolate for the best results—either dark, milk, or white chocolate works well. To melt the chocolate, you can use either a microwave or a double boiler method.
Microwave Method: Place the chopped chocolate in a microwave-safe bowl and heat in short bursts of 20-30 seconds, stirring in between until smooth. Be cautious to avoid overheating, as chocolate can burn easily.
Double Boiler Method: Fill a saucepan with a couple of inches of water and bring it to a simmer. Place a heatproof bowl on top of the saucepan, ensuring it doesn’t touch the water. Add the chocolate to the bowl and stir until melted and smooth.
Whichever method you choose, ensure that no water or steam comes into contact with the chocolate, as this can cause it to seize. Once melted, let the chocolate cool slightly before dipping the cheesecake bombs.
Coating the Cheesecake Bombs
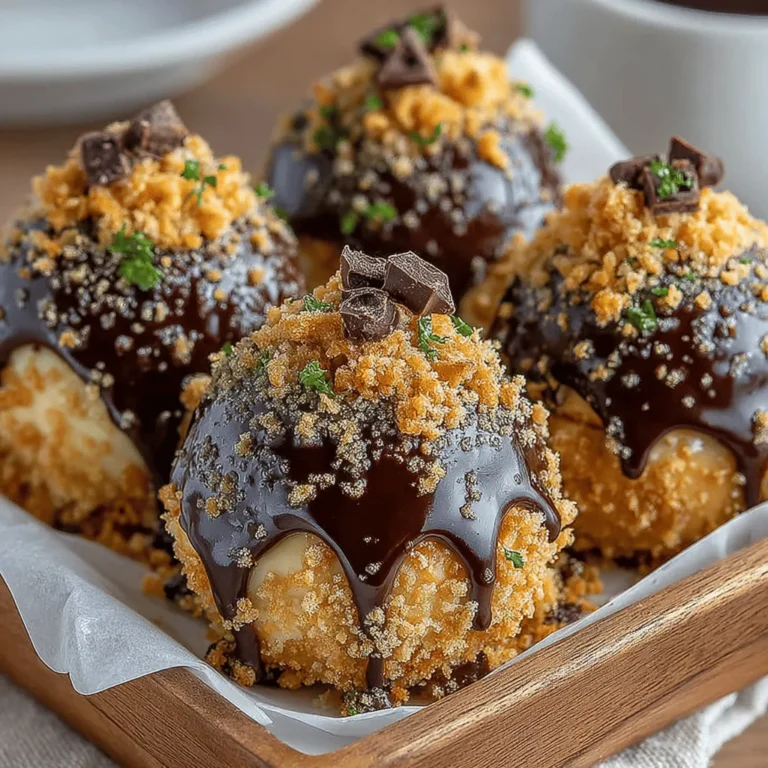
With the cheesecake bombs frozen solid and the chocolate melted, it’s time to coat them. Using a fork or a dipping tool, dip each cheesecake bomb into the melted chocolate, ensuring it is fully coated. Gently tap off the excess chocolate and return it to the parchment-lined baking sheet.
For added flair, consider garnishing your cheesecake bombs immediately after coating. You can sprinkle crushed cookies, drizzle with white chocolate, or even add colorful sprinkles for a festive touch. This not only enhances the visual appeal but also adds an extra layer of flavor and texture.
Setting the Cheesecake Bombs
After coating, it’s essential to let the chocolate set. You can allow the bombs to sit at room temperature for about 10-15 minutes, or place them back in the refrigerator for quicker setting. Once the chocolate coating is firm, you can carefully transfer them to an airtight container for storage.
To ensure the best presentation, allow the cheesecake bombs to set completely before serving. This will also help maintain the integrity of the chocolate coating, preventing it from cracking when bitten into.
Serving Suggestions
Presentation Ideas for Cheesecake Bombs
When it comes to serving your No-Bake Cookie Butter Cheesecake Bombs, presentation is key to elevating the experience. Consider arranging the bombs on a decorative platter, perhaps dusting the platter with cocoa powder or crushed cookies for an elegant touch.
For an interactive dessert experience, place the cheesecake bombs in small cupcake liners on a tiered stand. This not only makes them easy to grab but also adds height and visual interest to your dessert table. You can also create a dessert charcuterie board by mixing these bombs with an assortment of fruits, nuts, and other candies, providing a delightful spread for guests to enjoy.
Ideal Pairings and Accompaniments
Pairing your cheesecake bombs with complementary flavors can enhance their appeal. A glass of cold milk or a rich coffee can beautifully balance the sweetness of the cheesecake. For something more festive, consider serving the bombs alongside dessert wines, such as a sweet Riesling or a chocolate port.
If you want to create a more elaborate dessert experience, serve the cheesecake bombs with a side of whipped cream or a drizzle of salted caramel sauce. Fresh berries, such as raspberries or strawberries, not only add a pop of color but also provide a tart contrast that complements the sweetness of the cheesecake bombs.
Conclusion: Enjoying Your No-Bake Cookie Butter Cheesecake Bombs
No-Bake Cookie Butter Cheesecake Bombs are not just a delightful dessert; they embody simplicity and indulgence, making them an ideal treat for any occasion. With their rich flavor and creamy texture, these cheesecake bites are bound to become a favorite in your dessert repertoire. Whether you’re sharing them at a party or enjoying them as a sweet indulgence at home, they offer the perfect balance of convenience and decadence.
Take pride in the process of creating these delicious bites, and relish the joy they bring to your dessert table. With just a few ingredients and minimal effort, you can impress family and friends alike. So, gather your ingredients, follow the steps, and dive into the delicious world of No-Bake Cookie Butter Cheesecake Bombs—your taste buds will thank you!


